
Garage Guide X — the home-garage maintenance handbook

Field guide 01 · Driveway maintenance

The home-garage handbook: jobs you can actually do on your own driveway

Most of what keeps a car healthy is not complicated. It is a short list of small, repeatable jobs — fluids, filters, tires, pads, terminals — done on schedule, in a space with enough light to see what you are doing. This guide covers how to set that space up, what to buy first, how to support a vehicle without gambling with it, and where the honest line sits between a driveway job and a shop job.

Read time
About 6 minutes
Audience
US owners, no prior experience assumed
Covers
Workspace · tools · safety · nine jobs

Walk through an oil change Read the questions

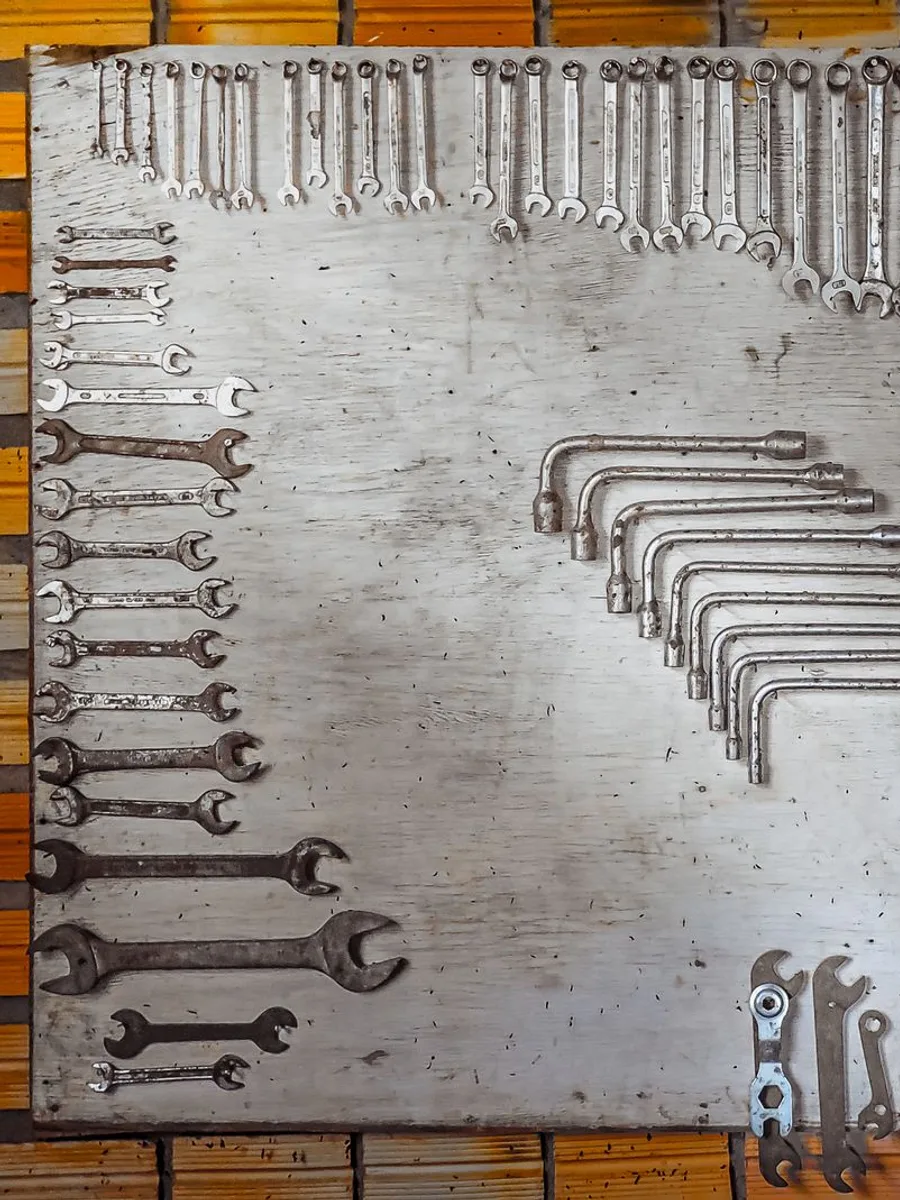
Rows of open-end and combination wrenches and L-shaped socket bars hung in size order on a whitewashed plywood tool board mounted to an amber slatted workshop wall

FIG. 01 — A tool wall kept in size order. Finding the right wrench quickly is half of why home jobs stay short.

Set the space up before you buy a single tool

A home garage is a place to work, not a place to store tools. The difference is mostly floor: one clear, level, well-lit area big enough to open a door, kneel down and set a wheel aside.

Level ground comes first. Most American driveways slope so water runs to the street — fine for washing a car, a problem for lifting one. A jack pushes the car downhill as it rises, and a car sitting on stands wants to walk. If the only flat concrete you have is inside, lift inside; if nothing is flat, use a shop.

Light comes second. One ceiling bulb throws your own shadow onto everything you reach for. A bright overhead fixture plus a rechargeable magnetic work light fixes it. You cannot inspect what you cannot see, and most of the value in home maintenance is inspection.

Then the boring infrastructure

A surface. One bench or folding table kept clear, with only the current job on it. A bench that has quietly become storage is a bench you stop using.

Power and a floor plan. A grounded outlet within reach beats a cord snaking across the area you are about to kneel in. Cardboard or a drip tray under the engine first: oil stains concrete permanently and makes it slick.

Somewhere for small parts. Magnetic trays or labelled bags. Clips and brake hardware that came out in a particular order will not stay in that order in your memory.

Air, always. Never run an engine with the garage door down. Carbon monoxide has no smell, and an attached garage shares air with the house.

A jack lifts a car. Jack stands hold it. Nothing you own is worth putting a shoulder under a vehicle balanced on hydraulics alone.

Rule 01 — the one with no exceptions

The starter kit that earns its place

Sockets and a ratchet. A 3/8-inch drive set in metric and SAE, plus extensions and a swivel.

Combination wrenches. For the fasteners a socket cannot reach. Buy the set, not single sizes.

A torque wrench. Roughly 20 to 150 pound-feet covers wheel nuts, drain plugs and suspension bolts.

A rated floor jack. Rated well above your vehicle's weight, and steadier than a bottle jack.

Jack stands, in pairs. Rated and pinned, set on concrete rather than asphalt, which dents in summer heat.

Wheel chocks. Cheap, and the thing that stops a car rolling off the stands.

Drain pan and funnels. A sealed pan with a pour spout carries used oil straight to the recycling counter.

An oil filter wrench. Cap-style, matched to your filter. Strap wrenches work but chew the canister.

A real tire gauge. Dial or digital, kept in the car. Gas-station gauges drift.

Gloves and eye protection. Nitrile for fluids, glasses for anything overhead.

Consumables. Shop towels, brake cleaner, penetrating oil, a wire brush and a terminal brush.

A basic code reader. A stored code is not a diagnosis, but it narrows the conversation.

What to skip at the start. Rolling tool chests, cheap impact wrenches and single-purpose specialty tools. Many national parts chains lend tools against a refundable deposit — use that for the thing you need once.

Safety is the part you cannot improvise

Nearly everything in this guide is low-risk. Lifting a vehicle is not, and it is the one area where shortcuts have permanent consequences. Treat what follows as fixed procedure, not advice.

A gloved hand lifting the oil filler cap off the cam cover of a modern car engine with the hood raised overhead
FIG. 02 — Under-hood work with the car still on its wheels is the safest place to start: filler caps, filters, terminals and fluid levels need no lifting at all.

Lifting and supporting

Level, chocked, in park. Flat concrete, parking brake set, an automatic in park or a manual in gear, and chocks in front of and behind a wheel that is staying down.

Use the designated jacking points. Your owner's manual shows them: reinforced pinch welds or subframe pads. Lifting on a floor pan, a control arm or an oil pan bends metal.

Transfer the load onto stands. Raise with the jack, slide rated jack stands under a rated support point, lower the car onto them, then leave the jack in light contact as a backstop. Never put any part of your body under a car held up by a jack alone.

Push-test before you commit. Push firmly on a fender. If anything shifts, rocks or clicks, lower it and start again. Only then does anything of yours go underneath.

Everything else that catches people out

Heat. Exhaust parts stay hot far longer than you expect, and a pressurised cooling system sprays scalding coolant if opened warm. Caps come off cold.

Batteries. Negative terminal off first and on last, so a slipped wrench cannot short across the battery. They vent hydrogen: no sparks, no flame, no smoking.

Fluids. Used oil is hazardous waste. Coolant tastes sweet and is toxic to pets and children, so clean spills at once and leave no open pan standing.

Have an extinguisher. A dry-chemical ABC extinguisher within arm's reach, and a phone in your pocket.

If a job needs a tool that stores energy, a calibration you cannot perform, or produces a fault that only shows up at speed — that is a shop job, and saying so is not a failure of nerve.

Rule 02 — knowing where the line sits

The jobs a confident owner can genuinely handle

Oil and filter. The grade and specification named in the manual, a new crush washer on the drain plug, the filter gasket wiped with fresh oil, the plug torqued rather than leaned on. Refill, run briefly, recheck.

Engine air filter. Two or four clips and a lid. Note which way up the element sat and fit the new one the same way.

Cabin air filter. Behind the glove box, or under the dash or cowl. A stale heater smell or weak fan points here first.

Wiper blades. Replace in pairs, lay a towel on the glass while the arm is bare, and check the refill clicks home.

Battery terminals. Crust on the posts adds resistance and mimics expensive electrical faults. Negative off first, clean posts and clamps, negative on last.

Tire pressure. Monthly, cold, against the door-jamb placard — not the sidewall figure, which is a maximum. Include the spare.

Tire rotation. Follow your manual's pattern. It evens out wear and gives you a reason to inspect every corner.

Brake pad inspection. Look through the spokes, or pull the wheel for a proper look at both pads and the disc. On many newer cars the electric parking brake needs a scan tool in service mode before the caliper retracts.

Topping fluids. Washer fluid freely; coolant only cold, to the cold-fill mark, to the manual's specification; oil in small amounts. Repeated topping means a leak.

The jobs that belong in a professional shop

A good home mechanic is defined as much by what they decline as by what they attempt. The reasons below are structural, not a matter of nerve.

  • Anything under spring tension. Strut and coil-spring work needs a proper compressor, and a slip is severe. The clearest case of stored energy.
  • Air conditioning. Refrigerant handling is federally regulated and needs recovery equipment. Venting it is unlawful, and the fault is usually a leak.
  • Brake hydraulics. Opening the circuit — calipers, hoses, hard lines, master cylinders — introduces a failure mode that only appears when you need to stop.
  • Timing belts and chains. On an interference engine a single tooth out of place turns a service item into a rebuild.
  • Airbags and restraint systems. Pyrotechnic devices with their own service procedures. Leave the yellow connectors alone.
  • Transmission internals. Special tools, clean-room tolerances and model-specific fluid specifications.
  • Wheel alignment. Needs a rack and calibrated measurement. Nothing about it can be approximated in a driveway.
  • A code that keeps coming back. Clearing it repeatedly is not a repair. A recurring fault needs live data behind it.

There is no shame in the referral. What your home work buys is a car that arrives with clean terminals, correct pressures, fresh oil and an owner who can describe the symptom precisely.

Keep a written record

After every job, write down four things: the date, the odometer reading, what you did, and the part numbers and fluid specification you used. A glove-box notebook is enough.

It pays back three ways. It exposes patterns — a coolant level that creeps down every third month is a slow leak. It supports a warranty claim: a US manufacturer generally cannot void your warranty for self-service but can ask for evidence. And a documented history is one of the few things a private buyer pays extra for.

Workshop habits

Six habits that make a home garage work

None of these are about skill. They are about setting the space up so the job goes the way you intended.

01 / Ground

Level, every time

Find the flattest concrete you have and do the lifting jobs there. A sloped driveway pushes the car away from the jack as it rises, which is exactly the wrong direction.

02 / Light

Light you can aim

One overhead fixture plus a magnetic work light you can stick where you are actually looking. Most of home maintenance is inspection, and inspection is limited by what you can see.

03 / Bench

One job on the bench

Keep a single clear surface and put only the current job on it. A bench that has quietly become storage is a bench you stop using, and small parts vanish into clutter.

04 / Torque

Torque, not muscle

Wheel nuts, drain plugs, spark plugs and suspension bolts all have a published figure. A click-type wrench removes the guesswork that strips threads and snaps studs.

05 / Waste

A disposal plan first

Know where the used oil is going before you pull the plug. A sealed drain pan plus a nearby counter that accepts oil and filters turns disposal into one stop on the way home.

06 / Record

Write the job down

Date, mileage, what you did, part numbers. It exposes slow leaks, supports a warranty claim, and is one of the few things a private buyer will pay extra for.

Worked example

An oil and filter change, start to finish

Read your manual for the grade, capacity, filter part number and drain plug torque before you begin. Those four numbers are car-specific, and nothing here replaces them.

  1. Step 01 · Prepare

    Warm it, park it, secure it

    Run the engine for a few minutes so the oil flows freely, then shut it off and give the exhaust a little time to stop being dangerous to touch. Park on level ground, set the parking brake, and chock the rear wheels. Lay cardboard under the engine.

  2. Step 02 · Support

    Lift and support properly

    If you need clearance, jack at the manufacturer's designated point, lower the car onto rated jack stands, and push-test it before going underneath. Drive-on ramps are a good alternative for an oil change because the wheels stay loaded. Whichever you use, nothing of yours goes under a car held by a jack alone.

  3. Step 03 · Drain

    Drain, then swap the filter

    Position the pan, loosen the drain plug with a socket rather than an adjustable wrench, and let it drain fully. Fit a new crush washer. Remove the old filter — expect a small flood — wipe the mounting face clean, smear fresh oil on the new filter's gasket, and tighten it to the instruction printed on the filter itself, which is usually hand-tight plus a defined fraction of a turn.

  4. Step 04 · Refill

    Refill, then check twice

    Torque the drain plug to the figure in the manual. Lower the car. Add slightly less than the stated capacity through a funnel, then check the dipstick and bring it up to the mark in small amounts. Start the engine, watch the oil pressure light go out, run it for half a minute, shut it down, wait a few minutes, and check both the level and the plug and filter for weeping.

  5. Step 05 · Close out

    Clean up and record it

    Seal the used oil in the pan or a clean container, bag the old filter after it has drained overnight, and take both to a site that accepts used oil. Reset the oil-life monitor if your car has one. Write the date, mileage, oil specification and filter number in your log before you forget them.

Questions we get

Frequently asked questions

Do I need a lift or an inspection pit to do anything useful?

No. A flat, level slab, a rated floor jack, a pair of jack stands and a set of chocks cover almost every job in this guide. A lift buys comfort and speed rather than access to jobs you could not otherwise reach.

Can I use the scissor jack from the trunk for maintenance?

It is designed for a roadside wheel change with nobody underneath the car, and that is the only job it should do. For maintenance, lift with a rated floor jack and transfer the load onto jack stands before any part of your body goes under the vehicle.

How often should I change the oil?

Follow the interval in your owner's manual for your engine and your driving pattern, and use the oil grade and specification it lists. Many modern cars also run an oil-life monitor on the dash. Short trips, towing, dusty roads and heavy idling usually fall under the manual's severe-service schedule, which is shorter.

Will doing my own maintenance void my new-car warranty?

In the United States, the Magnuson-Moss Warranty Act generally prevents a manufacturer from voiding a warranty simply because you serviced the car yourself or used aftermarket parts. What matters is evidence: keep dated receipts for parts and fluids, note the mileage, and use products that meet the specification in the manual. If a manufacturer believes your work caused a specific failure, it can still contest that particular claim.

What do I do with used oil and old filters?

Used oil is regulated waste and must never go into a drain, the ground or household trash. Most auto parts chains and many municipal recycling centres accept used motor oil free of charge, and many take drained filters too. Drain the filter overnight into your pan, seal the oil in a clean container with a tight lid, and take both in together.

How do I tell when brake pads are worn?

Look at the friction material through the wheel spokes or with the wheel off, and compare it to the steel backing plate. Roughly a quarter inch of material is a common inspect-again threshold and around an eighth of an inch is usually the replacement point, but your manual or the pad maker's figure takes priority. A steady high-pitched squeal from a wear indicator, a grinding noise, or a pedal that feels different are all reasons to stop driving and have the brakes looked at.

Which one tool do home mechanics most often skip?

A torque wrench. Wheel nuts, drain plugs, spark plugs and suspension fasteners all have a specified figure, and guessing by feel is how drain plugs strip and wheel studs snap. A click-type wrench covering roughly 20 to 150 pound-feet handles most of what a home garage needs.

How do I know a job is beyond what I should attempt?

Three signals. The job needs a tool that stores energy or handles pressure, such as a spring compressor or refrigerant recovery equipment. The repair has to be calibrated or reset with dealer-level equipment afterwards. Or a mistake would only reveal itself as a failure while driving. Any one of those is a reason to book a licensed shop.

The workbench list

One short note a month, from the Garage Guide X desk

A seasonal checklist, one job explained in detail, and a plain-language note on what is worth doing at home this month. No parts are sold here and no repairs are booked here.

Nothing is stored or sent — the mailing list is not connected yet.

Editorial note

Garage Guide X is an independent editorial site. We publish written guides about maintaining a car at home. We do not sell parts, tools or fluids, we do not book repairs, we do not run a garage, and we are not paid by any manufacturer, parts brand or repair chain to recommend anything. Nothing on this page is an advertisement, and there is no offer attached to it.

This article is general information for a US audience, not instructions for your specific vehicle. Cars differ in jacking points, torque figures, fluid specifications, filter types and service intervals, and your owner's manual and the manufacturer's service information always take priority over anything written here. Some of the work described involves lifting a vehicle, hot components, pressurised systems and hazardous fluids, and carries a real risk of serious injury if done carelessly. If you are unsure at any point, or if the job falls into the list we describe as shop work, please use a qualified professional.

We correct things. If you find an error, or something that reads as unclear or unsafe, write to info@garageguidex.com and we will review it.